How to create Custom Objects, Fields, Picklist, and Help Pages in
Salesforce
Bonus Tutorial Field Editing
By Elizabeth Kilgore 12/28/2015
 |
| Salesforce Logo from Salesforce's Twitter Page |
Although Salesforce has Standard objects and standard fields, there may come a time when you will need to make a custom object and make custom fields. Since Objects, Fields, Picklist, and Help Pages go together I have fit them all in this one tutorial. For this tutorial, we are going to make a Custom Object and Fields by the name of candidates.
Create Custom Objects
The first thing we will need to do is click the setup bottom
at the top of our Salesforce page.
The easiest and fastest way to find things in the setup drop
down menu is to go to the Quick Findbox also known as the search box.
In the Quick Findbox you will enter Objects, which will go through the tabs and leave us with the options fitting our searched word as we can see there are a few tabs that match the search. We want to go under the Create tab and click Objects.
Click New Custom Objects
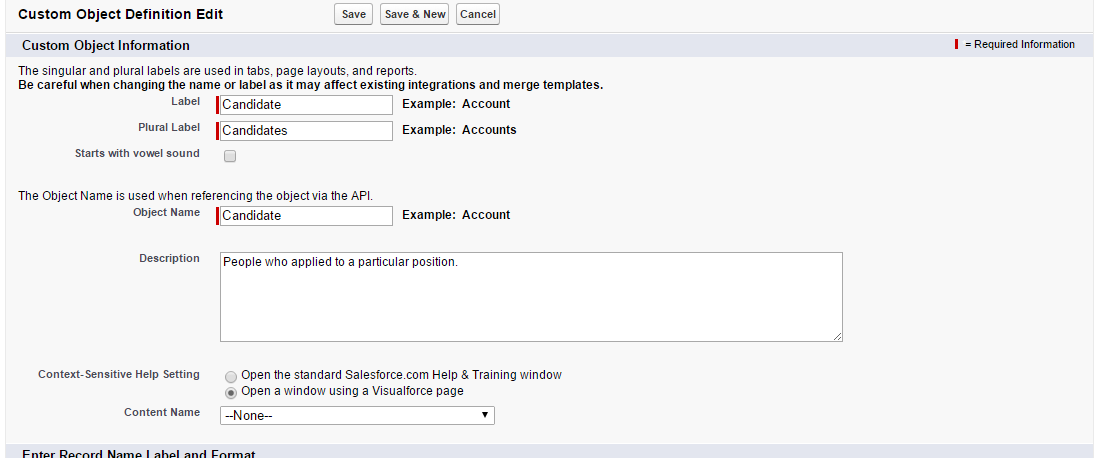
Now we see a blank New Custom Object page. We can now enter the information needed to make the custom label we need.
I am going to enter the examples Label: Candidate, Plural Label: Candidates, Object Name: Candidate the Object Name reflects the API (Application Programming Interface).
Under Object Creation Options check the Launch New Custom Tab
click save.
When we click save it take us to the New Customs Tab Page. Our Objects name will already be there
underneath that there is the Tab Style when we click on it a pop-up will appear, it gives us to the options buttons
Click the button that is labeled People, and click next. Now we are at the Add to Profiles pages, keep all of the defaults and click next, to go to the Add Custom Apps Page keep all of these defaults on this page as well and click save.
Making Custom Fields/Picklist
Now that we have finished making our New Custom Object lets make fields for it. Go to setup at the top of your page click Setup, go to the
Quick Findbox, we can see our new object label candidate on the title screen.
Click on the objects
name, in this case, click Candidate under the label tap.
On this page we see the title is Candidate, under the title
there are tabs hover over the tab labeled Custom Fields and Relationships and
click New.
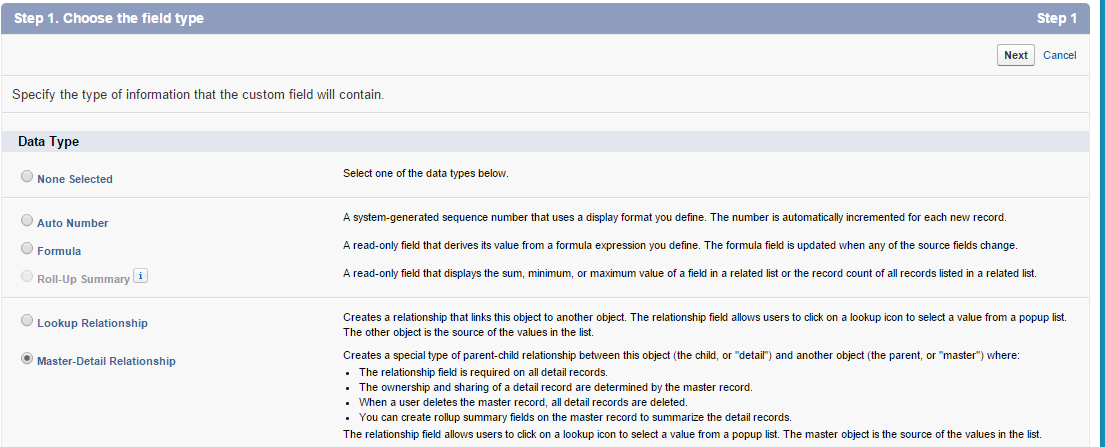
Scroll to the bottom of the page and check the circle that says Picklist and click next.
Now we can make our Custom Field and it's picklist.
Make sure that when you are filling out the picklist values you enter the picklist values in the order you want them in and in a line. Do not place the next to each other in a sentence style format because this will make just one long value. Instead, place them one under the other so that they may generate properly into the picklist. Also, the field name should be generated for you if it does not add an underscore instead of a space in the middle of each word. For example, the Field name needs to be a copy of the Field Label name you created here our label was Prospective Rating so for the Field Name we enter Prospective_Rating if the Label was saying Five Facts than the Field Name would look like Five_Facts. After this is filled out click next
keep all the customs on the next page and click next as shown in the photo which should be the default and click next.
Keep all of the customs on this page as default as well and press save.
Create Help Page
Repeat search steps Setup, Quick Findbox enter Pages, Develop tab, click
Visualforce Pages

On the Visualforce Page make sure you do not click Create New View make sure to click New next to the Developer Console button.

Enter the labels and the coding in the Markup Area

Click save
Next, we need to edit our Custom Object page so that the Help Page will show up on it when visited. Go to the Quick Findbox type Object go to the Create Tab and click Object. On the Custom Objects pages, we can see the Custom Object we created,
in front of it, there are two fields edit and delete click the edit field. In the Custom Object Information box scroll to the bottom of the Context-Sensitive Help Settings and check the circle Open A Window Using Visualforce Page
Right under the Context-Sensitive Help tab you will see the
Content Name tap it should say none click it and scroll to the name we just
created for the Help page this is labeled Job Candidate Help. Then click save
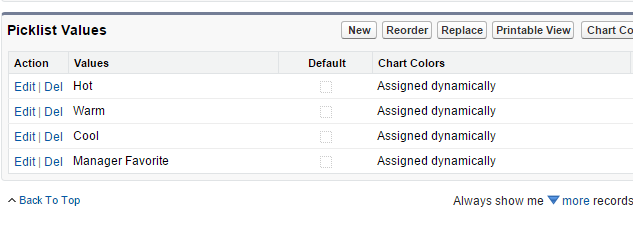
Editing Picklist
Quick Findbox type Object Create tab Objects click
Candidates Objects name scroll down to Custom Fields and Relationships box. Under Field Label click Prospects Rating.

On the Prospect Rating page go to
picklist values and click New
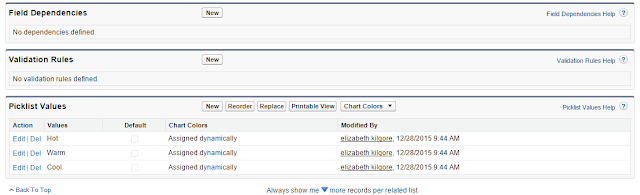
Type in Manager Favorite and click save.

You can now see the new value in the picklist section.